|


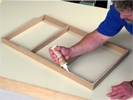
Foundation
Scrape |
DHTMLGoodies.com 00. This Slideshow illustrates the JM1065 Instructions pages 8 - 10
../../../RGT_Website_assets/ajax-loader.gif 00. This Slideshow illustrates the JM1065 Instructions pages 8 - 10
../../../RGT_Website_assets/ajax-loader.gif
DHTMLGoodies.com
 01. The Foundation is assembled (link for Foundation Assembly is at left)
01D.png
01. The Foundation is assembled (link for Foundation Assembly is at left)
01D.png
DHTMLGoodies.com
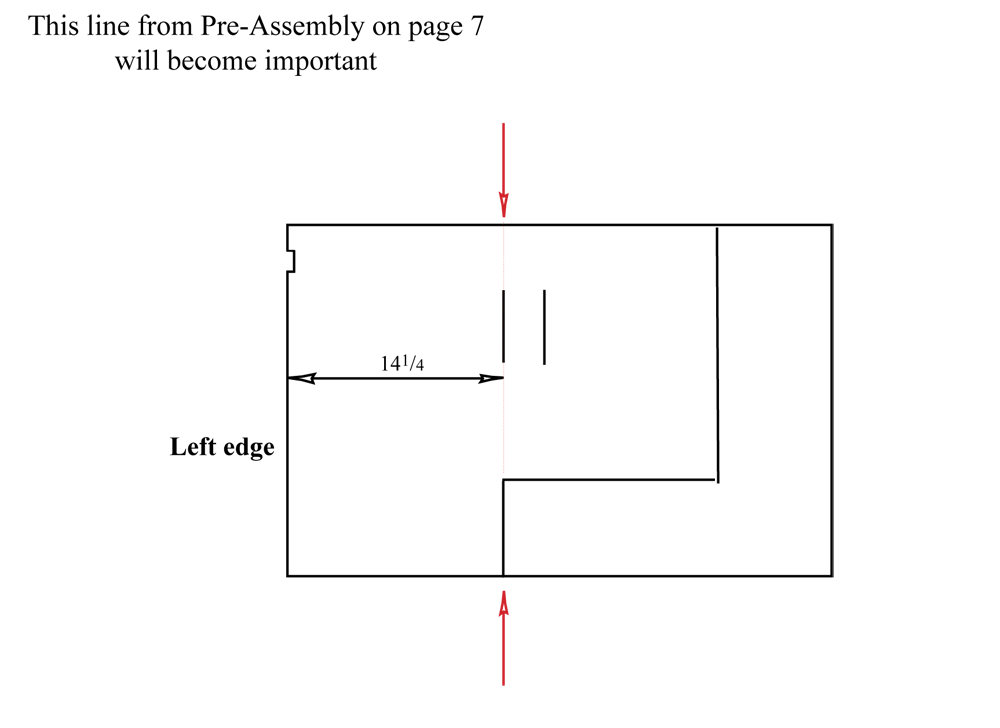
 02. The line for the left side of the stair position will become usedful
02D.png
02. The line for the left side of the stair position will become usedful
02D.png
DHTMLGoodies.com
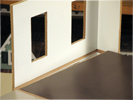
 04. View from the back: Base Floor, lined up on the back and left edges
04D.png
04. View from the back: Base Floor, lined up on the back and left edges
04D.png
DHTMLGoodies.com
 05. Adjust the Foundation as necessary to make it line up
05D.png
05. Adjust the Foundation as necessary to make it line up
05D.png
DHTMLGoodies.com
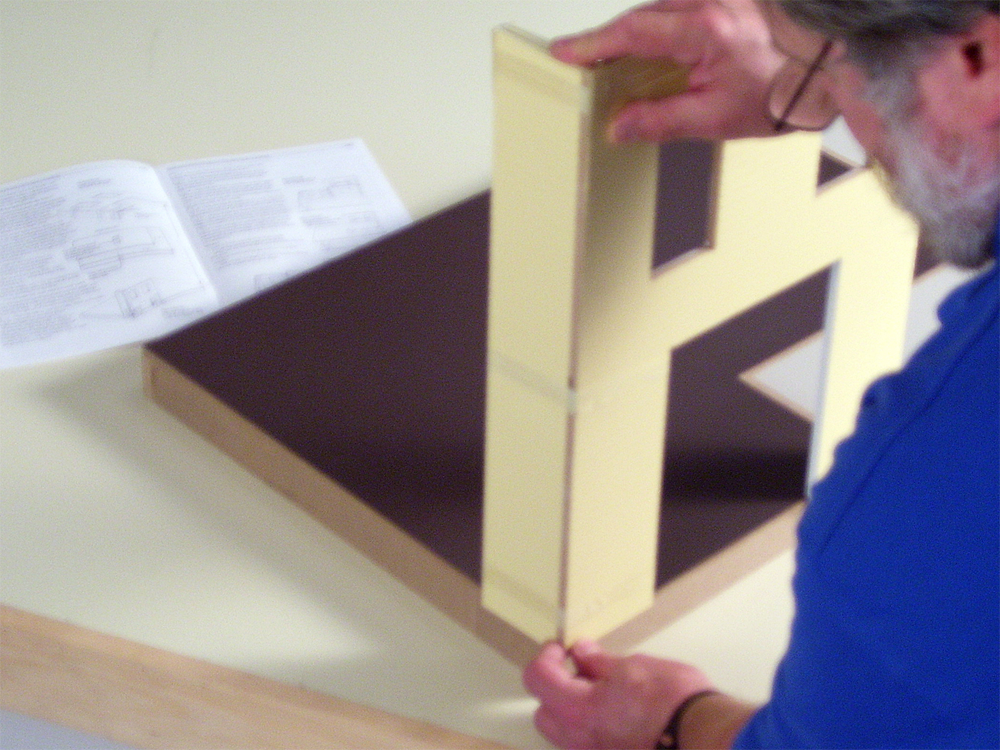
 07. Page 9: The Gable Left Side glues behind the Gable Front
07D.png
07. Page 9: The Gable Left Side glues behind the Gable Front
07D.png
DHTMLGoodies.com
 08. Lined up top, bottom, on the edge, and at the grooves
08D.png
08. Lined up top, bottom, on the edge, and at the grooves
08D.png
DHTMLGoodies.com
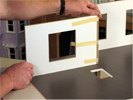
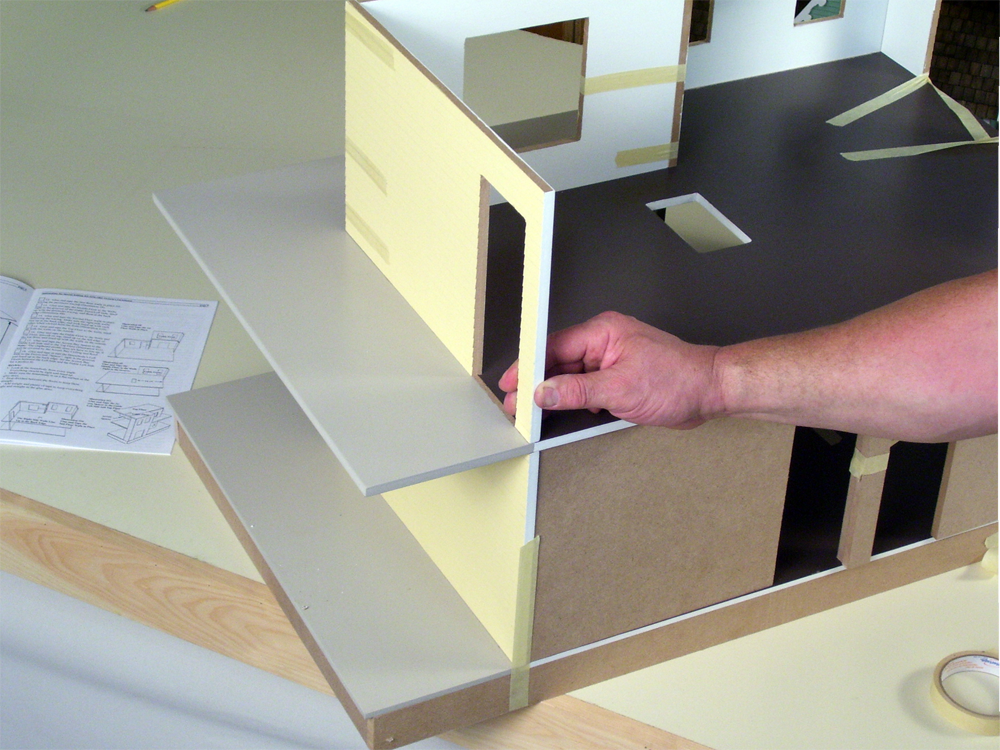
 16. The outside face lines up with the stairhole tracing
16D.png
16. The outside face lines up with the stairhole tracing
16D.png
DHTMLGoodies.com
 17. The Lower Right Front glues to the face of the Gable Right Side
17D.png
17. The Lower Right Front glues to the face of the Gable Right Side
17D.png
DHTMLGoodies.com
 20. The Lower Right Side glues to the right edge of the Lower Right Front
20D.png
20. The Lower Right Side glues to the right edge of the Lower Right Front
20D.png
DHTMLGoodies.com
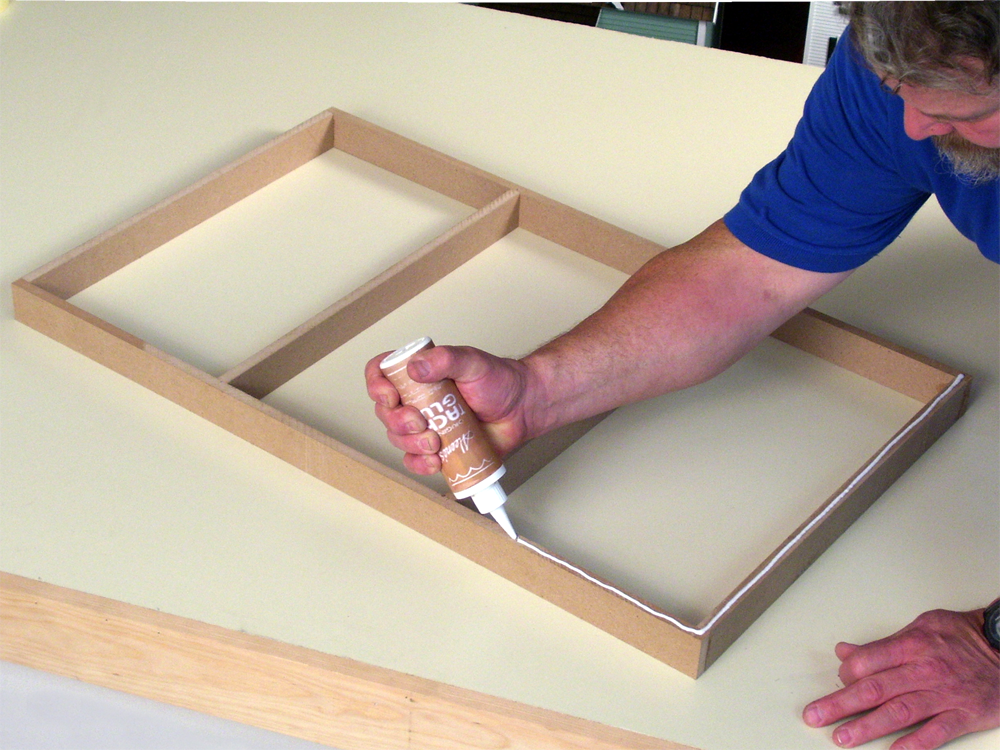
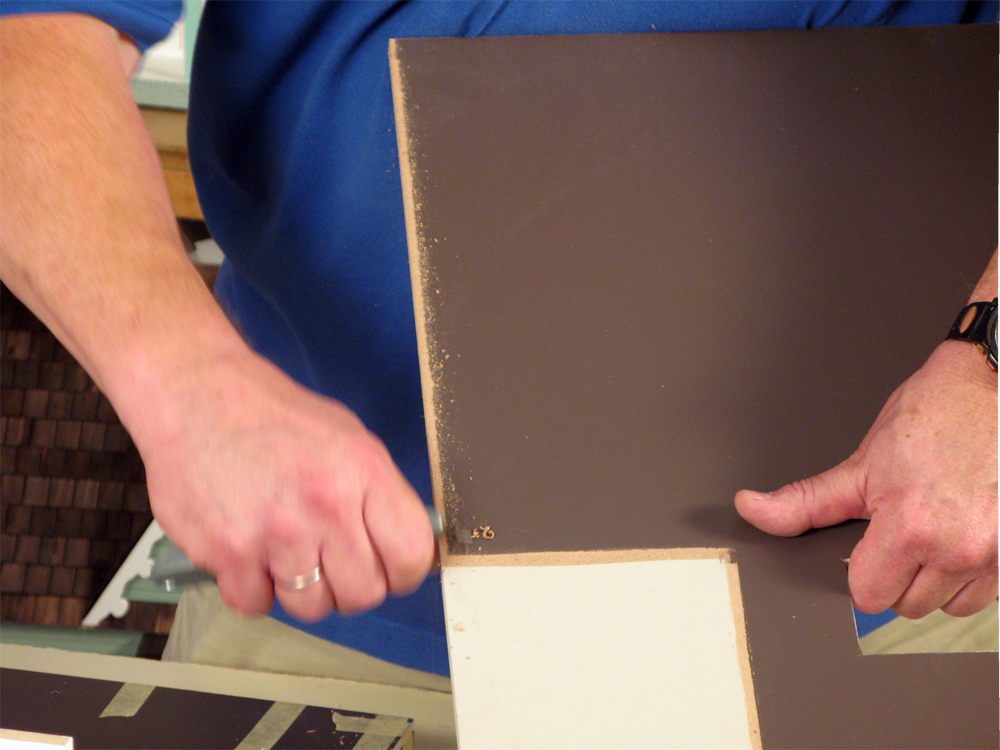
 21. Clean the Mid Floor and grooves (see "Scrape" at left)
21D.png
21. Clean the Mid Floor and grooves (see "Scrape" at left)
21D.png
DHTMLGoodies.com
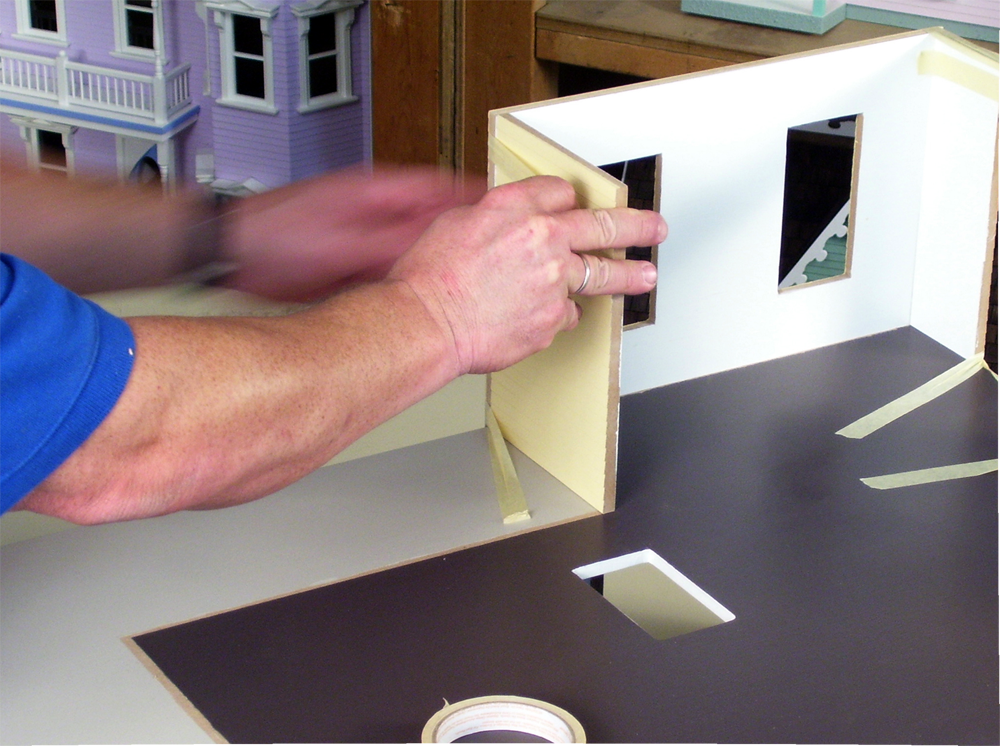
 24. Lift so the wall's glue doesn't smear while inserting into the grooves
24D.png
24. Lift so the wall's glue doesn't smear while inserting into the grooves
24D.png
DHTMLGoodies.com
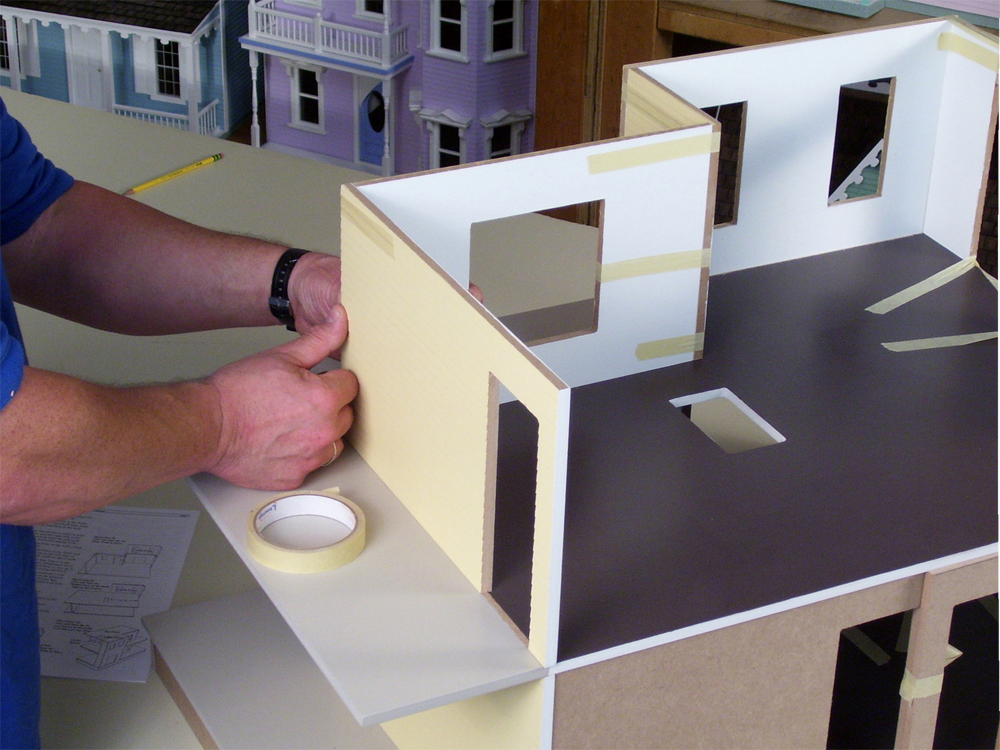
 26. Lined up in back, straighten and support with Dividers
26D.png
26. Lined up in back, straighten and support with Dividers
26D.png
DHTMLGoodies.com
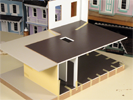
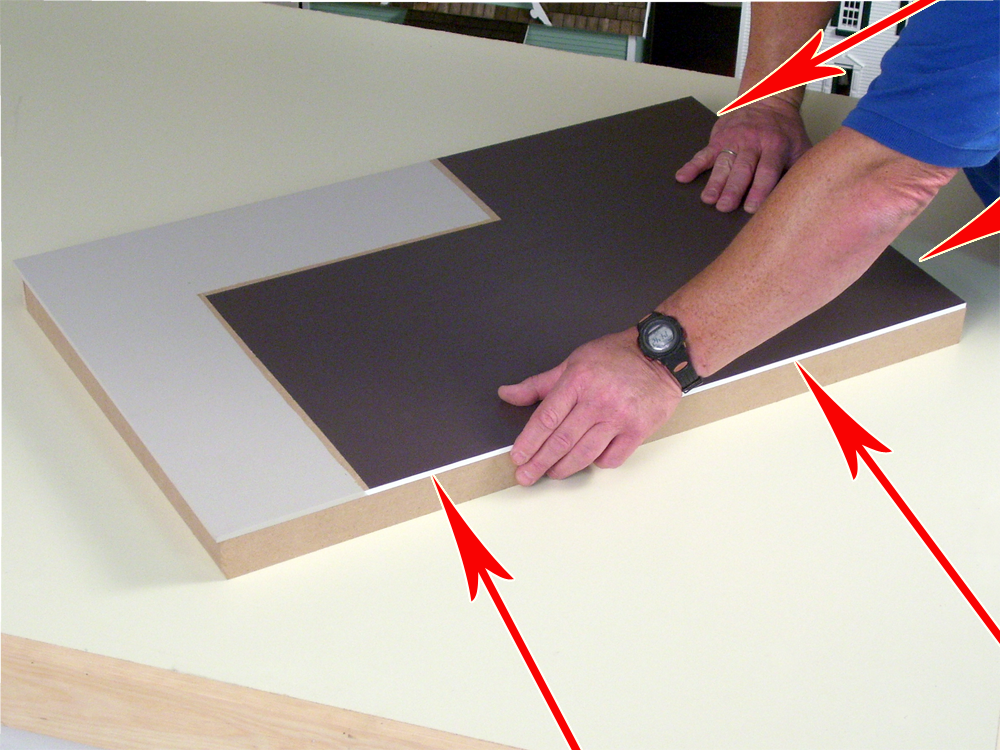
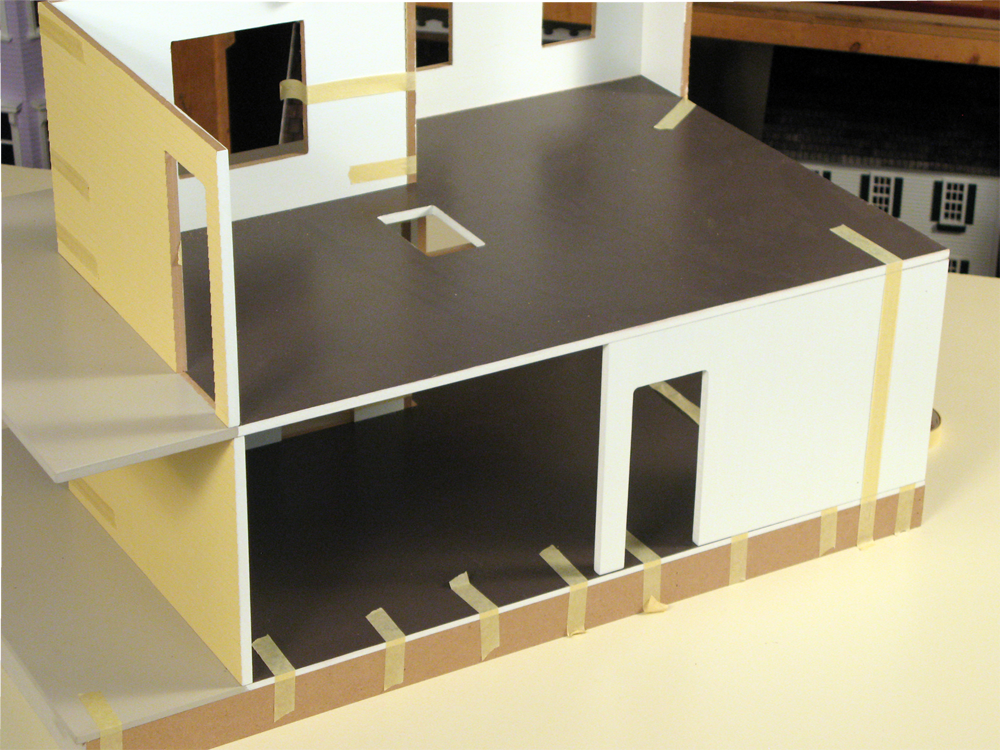
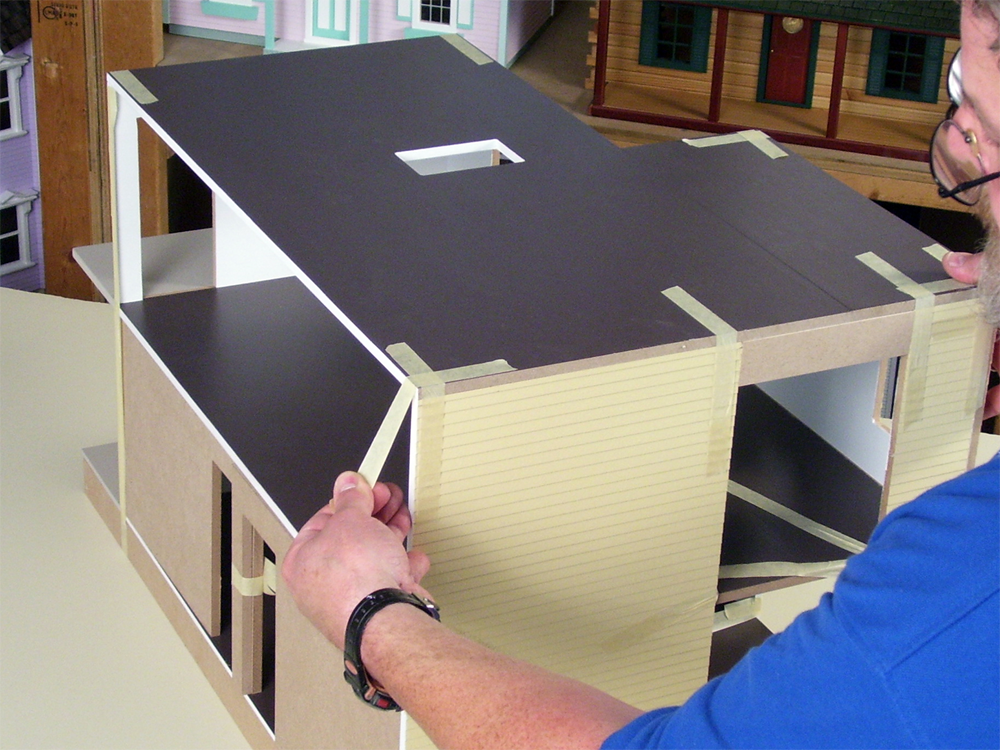
 38. the Top Floor lines up with the outsides of the walls
38D.png
38. the Top Floor lines up with the outsides of the walls
38D.png
DHTMLGoodies.com
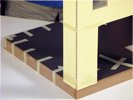
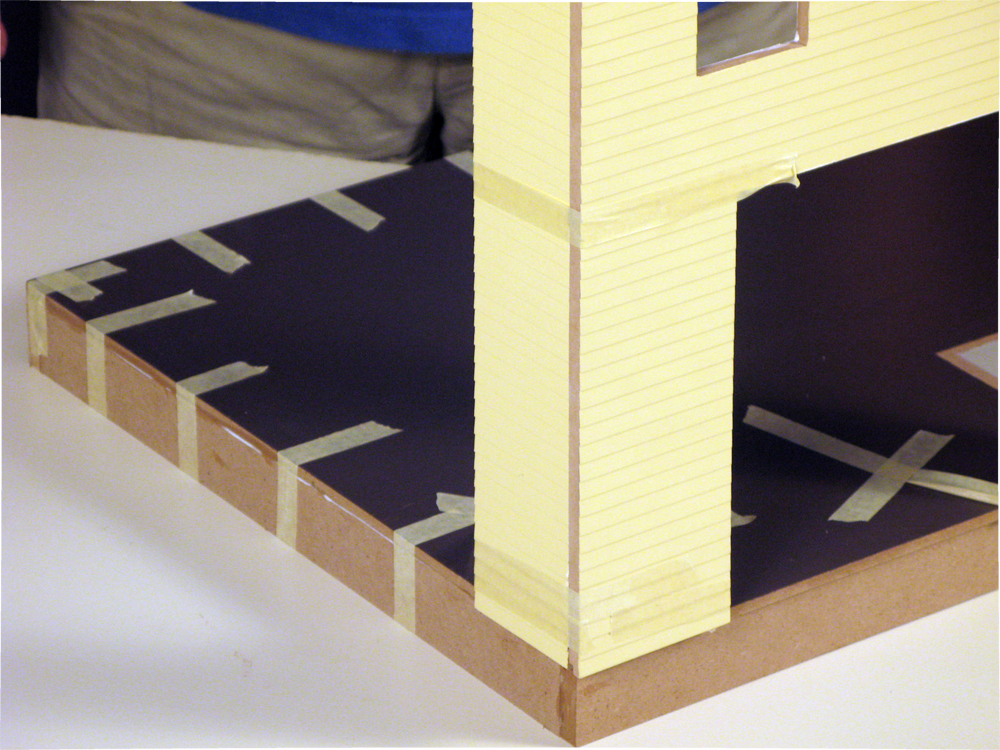
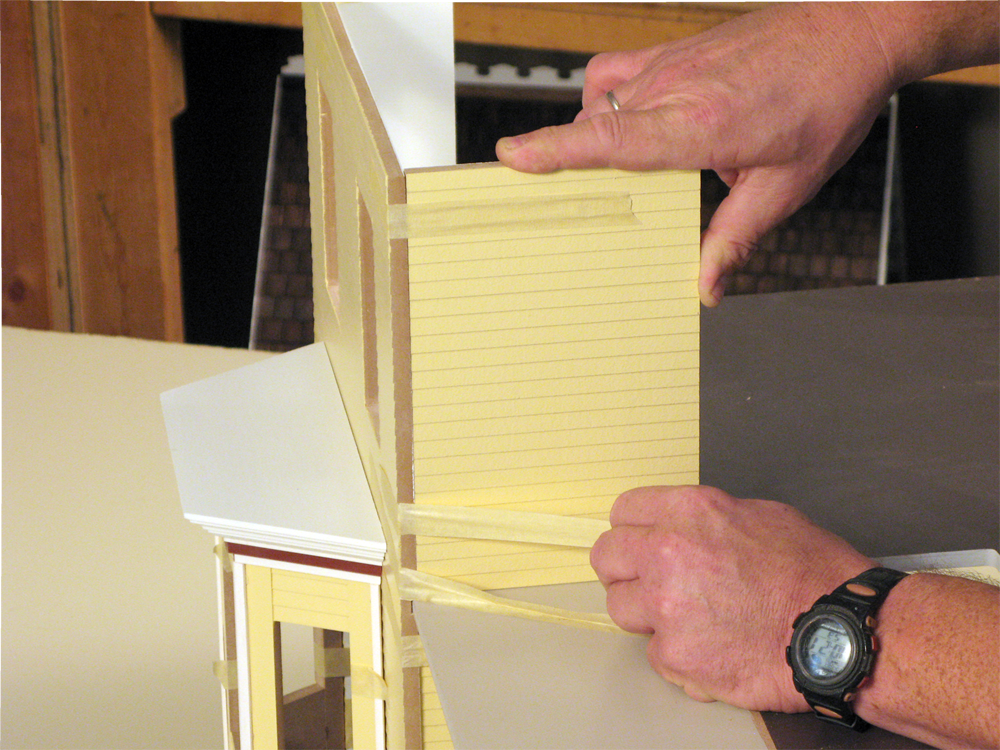
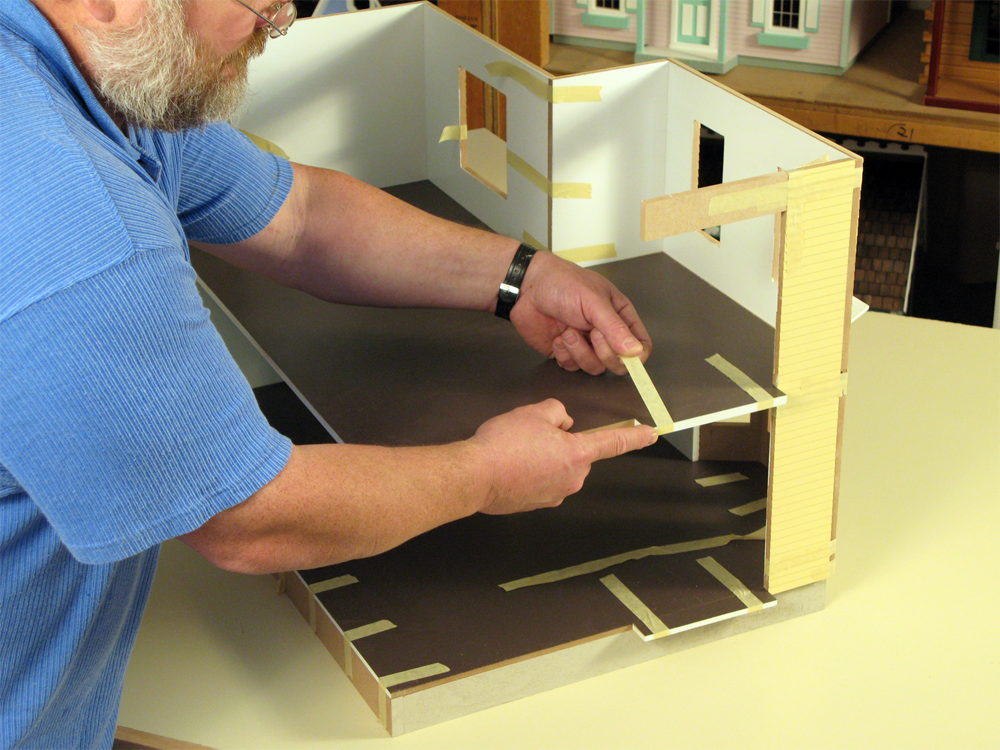
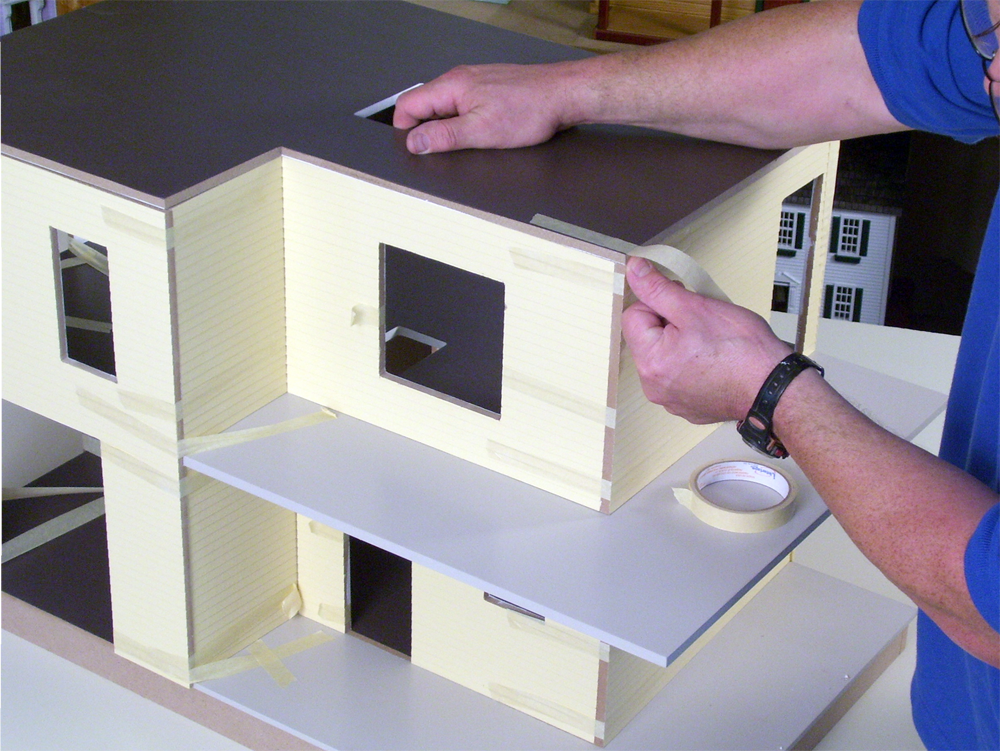
 43. Tape tightly in both directions for a corner that won't slip
43D.png
43. Tape tightly in both directions for a corner that won't slip
43D.png
DHTMLGoodies.com
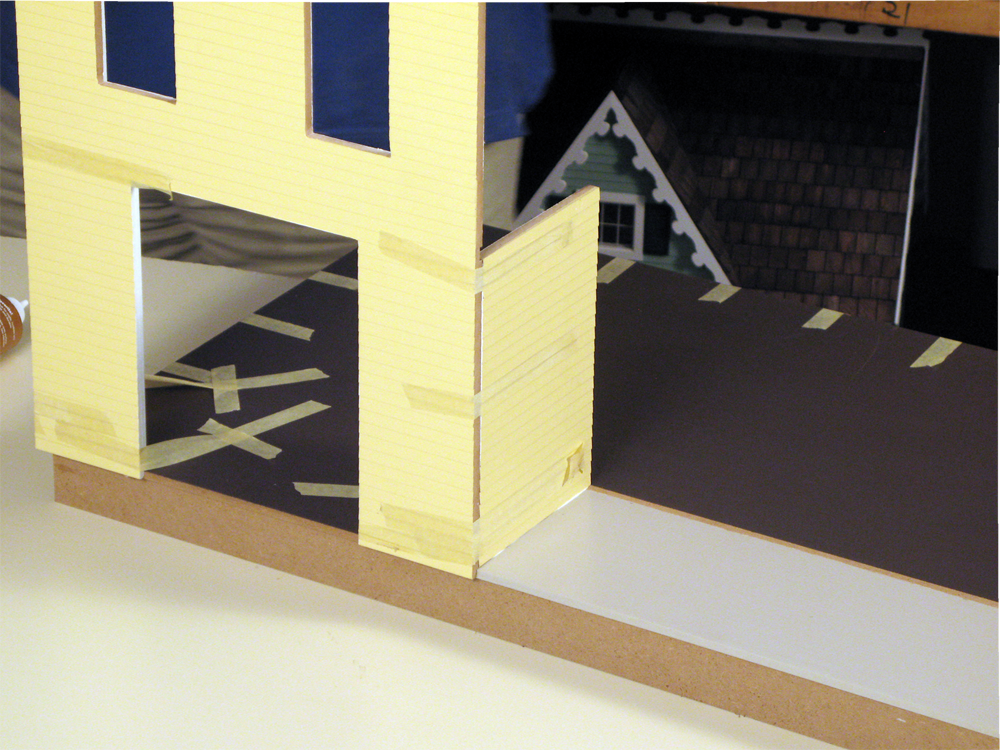
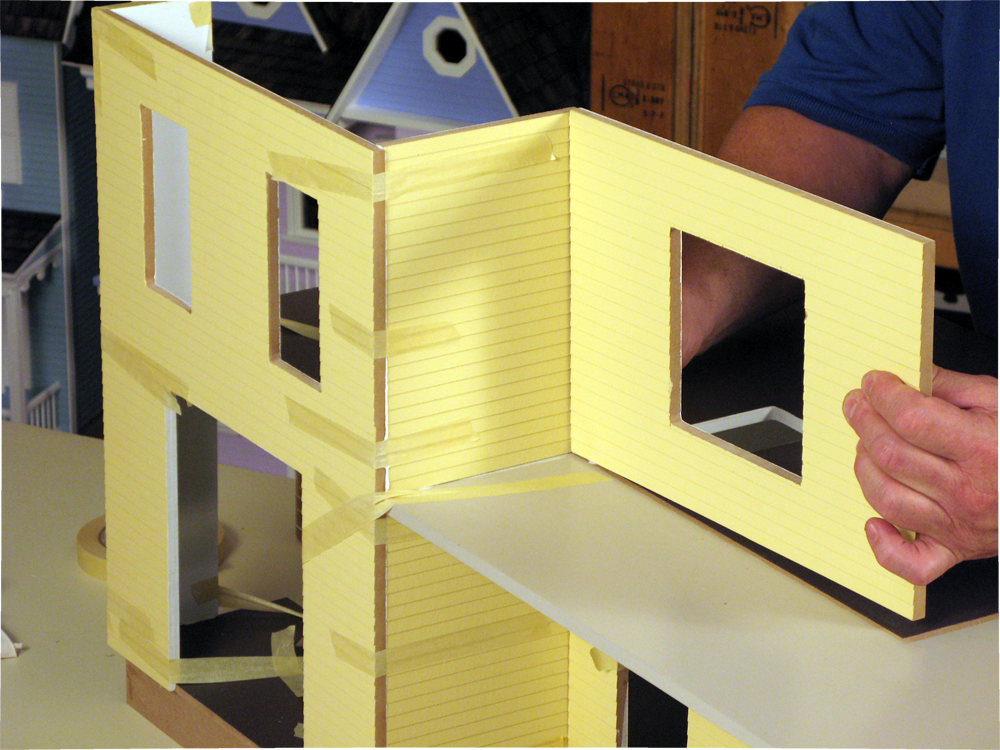
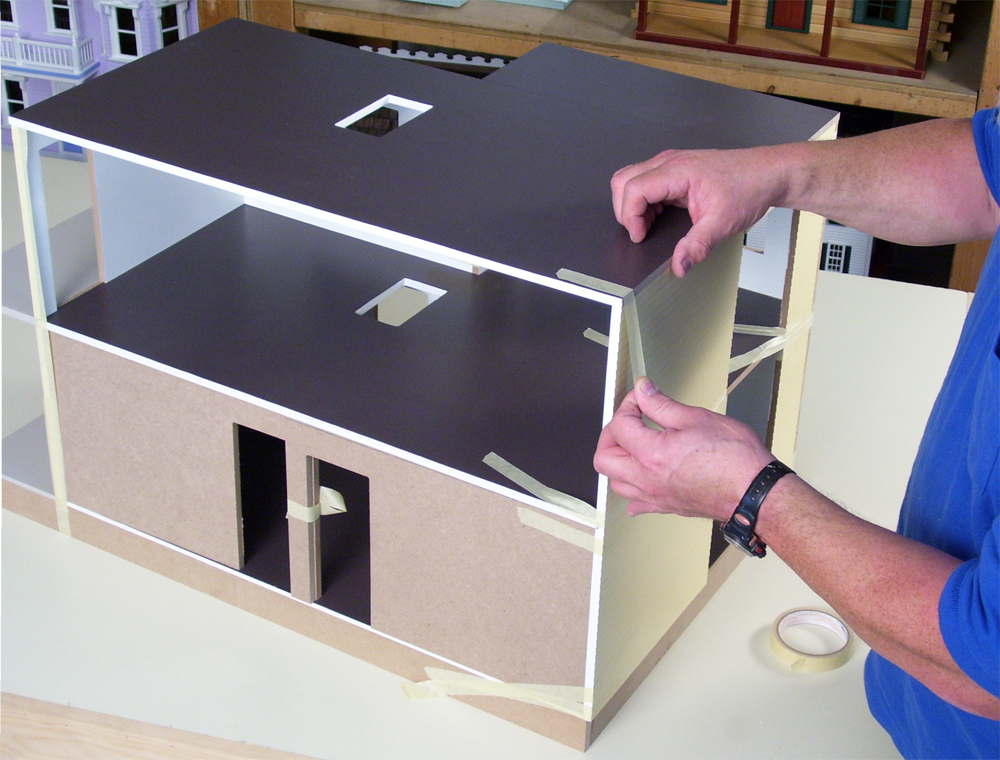
 44. Recheck all the corners, adjust if necessary, tape in both directions
44D.png
44. Recheck all the corners, adjust if necessary, tape in both directions
44D.png
|


