![]()
FrontBay Walls: orientation of parts
FrontBay Assembly
FrontBay Facia (here)
This slideshow supports and augments the instructions, but is not a substitute.
2020 instructions
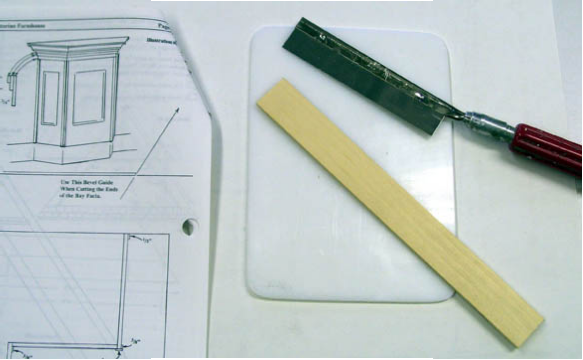
This is a way to use the "bevel guide". I have the instructions open to the illustration, a razor saw, a cutting board, and a leftover of stripwood

DHTMLGoodies.com
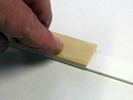
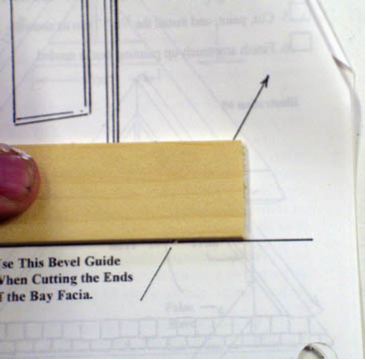
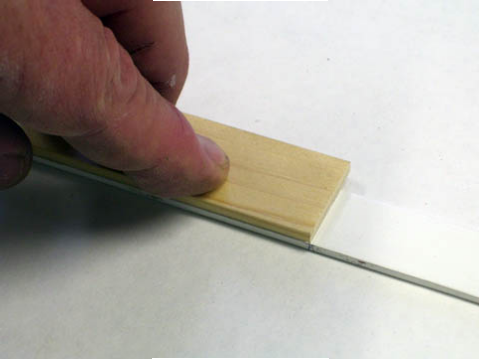
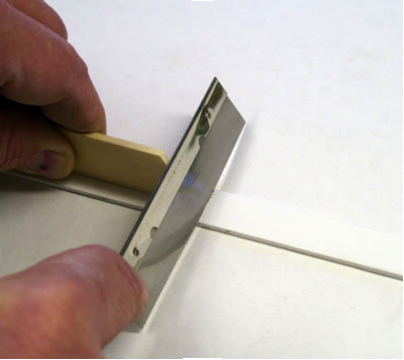
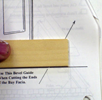 2. hold the stripwood on the "bevel guide". You will need one square end and one angled end. Make sure the end you aren't cutting is square.
02D.png
2. hold the stripwood on the "bevel guide". You will need one square end and one angled end. Make sure the end you aren't cutting is square.
02D.png
2. hold the stripwood on the "bevel guide". You will need one square end and one angled end. Make sure the end you aren't cutting is square.
02D.png
DHTMLGoodies.com
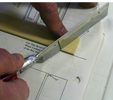
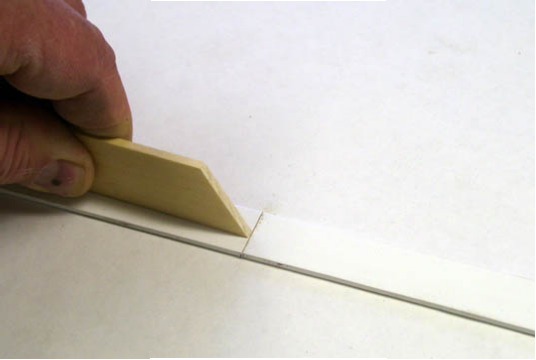
 4. Finish the cut on the cutting board (note: a wooden cutting board or a scrap of wood is less slippery than a plastic cutting board)
04D.png
4. Finish the cut on the cutting board (note: a wooden cutting board or a scrap of wood is less slippery than a plastic cutting board)
04D.png
4. Finish the cut on the cutting board (note: a wooden cutting board or a scrap of wood is less slippery than a plastic cutting board)
04D.png
DHTMLGoodies.com
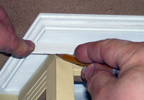
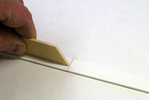
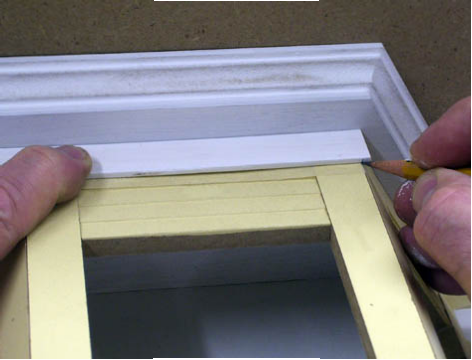
 5. This piece of 3/4" stripwood is painted on both sides. I am marking it at the corner of the FrontBay walls.
05D.png
5. This piece of 3/4" stripwood is painted on both sides. I am marking it at the corner of the FrontBay walls.
05D.png
5. This piece of 3/4" stripwood is painted on both sides. I am marking it at the corner of the FrontBay walls.
05D.png
DHTMLGoodies.com
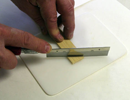
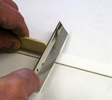
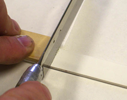 8. One or two strokes to get a straight-across starter kerf (the groove the sawblade makes)...
08D.png
8. One or two strokes to get a straight-across starter kerf (the groove the sawblade makes)...
08D.png
8. One or two strokes to get a straight-across starter kerf (the groove the sawblade makes)...
08D.png
DHTMLGoodies.com
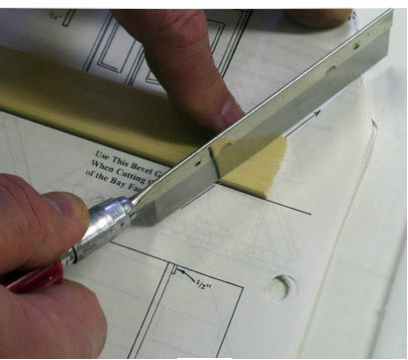
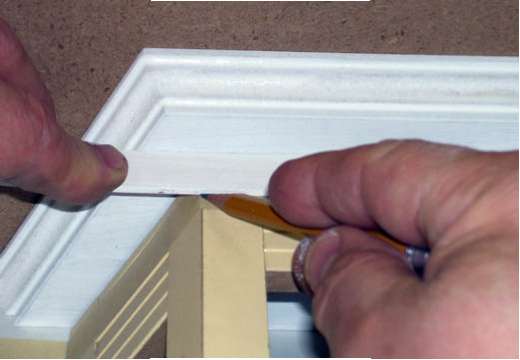
 9. ...then hold the angled end of the guide at the kerf (the direction of the bevel cut is 'out' from the mark)
09D.png
9. ...then hold the angled end of the guide at the kerf (the direction of the bevel cut is 'out' from the mark)
09D.png
9. ...then hold the angled end of the guide at the kerf (the direction of the bevel cut is 'out' from the mark)
09D.png
DHTMLGoodies.com
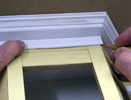
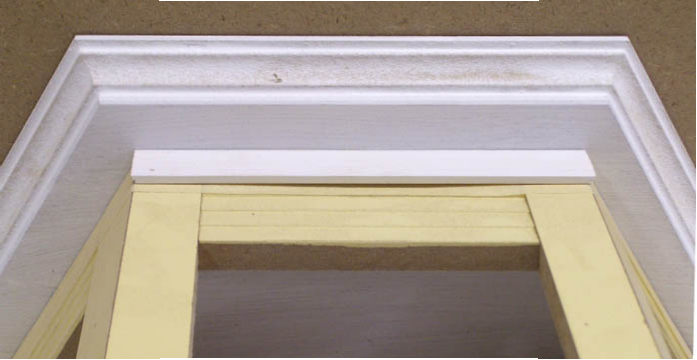
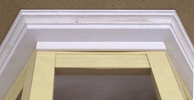 11. Here's the Front Facia. The offcut from this piece has the bevel angle already cut on one end. That's the end to put against the house for marking the Side Facia
11D.png
11. Here's the Front Facia. The offcut from this piece has the bevel angle already cut on one end. That's the end to put against the house for marking the Side Facia
11D.png
DHTMLGoodies.com
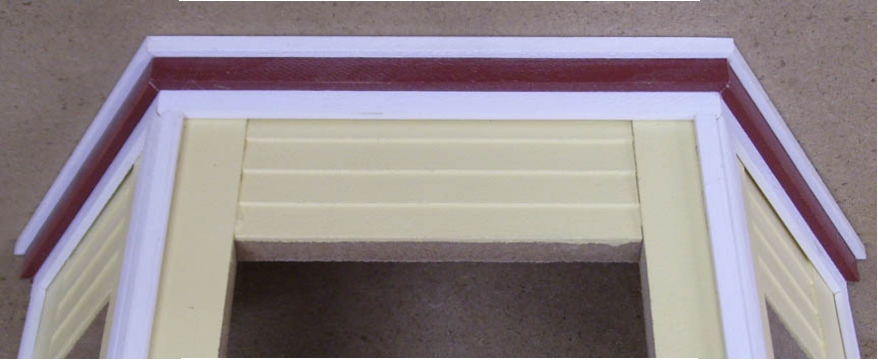
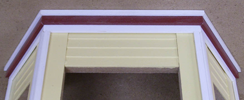 12. 3 layers of Bay Facia - 3/4", 3/8", and 3/16", all marked, beveled, and glued on. Then 3/16" vertical trim. Done!
12D.png
12. 3 layers of Bay Facia - 3/4", 3/8", and 3/16", all marked, beveled, and glued on. Then 3/16" vertical trim. Done!
12D.png
 12. 3 layers of Bay Facia - 3/4", 3/8", and 3/16", all marked, beveled, and glued on. Then 3/16" vertical trim. Done!
12D.png
12. 3 layers of Bay Facia - 3/4", 3/8", and 3/16", all marked, beveled, and glued on. Then 3/16" vertical trim. Done!
12D.png